We’ve just released an update to our participation report, which provides a view for our members into how they are each working towards best practices in open metadata. Prompted by some of the signatories and organizers of the Barcelona Declaration, which Crossref supports, and with the help of our friends at CWTS Leiden, we have fast-tracked the work to include an updated set of metadata best practices in participation reports for our members.
It’s been a while, here’s a metadata update and request for feedback In Spring 2023 we sent out a survey to our community with a goal of assessing what our priorities for metadata development should be - what projects are our community ready to support? Where is the greatest need? What are the roadblocks?
The intention was to help prioritize our metadata development work. There’s a lot we want to do, a lot our community needs from us, but we really want to make sure we’re focusing on the projects that will have the most immediate impact for now.
In the first half of this year we’ve been talking to our community about post-publication changes and Crossmark. When a piece of research is published it isn’t the end of the journey—it is read, reused, and sometimes modified. That’s why we run Crossmark, as a way to provide notifications of important changes to research made after publication. Readers can see if the research they are looking at has updates by clicking the Crossmark logo.
We’re happy to note that this month, we are marking five years since Crossref launched its Grant Linking System. The Grant Linking System (GLS) started life as a joint community effort to create ‘grant identifiers’ and support the needs of funders in the scholarly communications infrastructure.
The system includes a funder-designed metadata schema and a unique link for each award which enables connections with millions of research outputs, better reporting on the research and outcomes of funding, and a contribution to open science infrastructure.
Setting up your iThenticate v2 account MTS integration (admins only)
Documentation Menu
Setting up your iThenticate v2 account MTS integration (admins only)
This section of our documentation is for Similarity Check account administrators who are integrating iThenticate v2 with their Manuscript Submission System (MTS). It explains how administrators need to set up the iThenticate v2 account for their organizations in order to integrate with their MTS.
If you are using iThenticate v1 rather than iThenticate v2, take a look at the section for v1 account administrators.
If you intend to use iThenticate v2 directly in the browser (and not through an integration with your Manuscript Submission System (MTS) please skip to the section on setting up iThenticate v2 for browser users for iThenticate administrators.
Your personal administrator account in iThenticate v2
Once Turnitin has enabled iThenticate v2 for your organization, the main editorial contact provided on your application form will become the iThenticate account administrator.
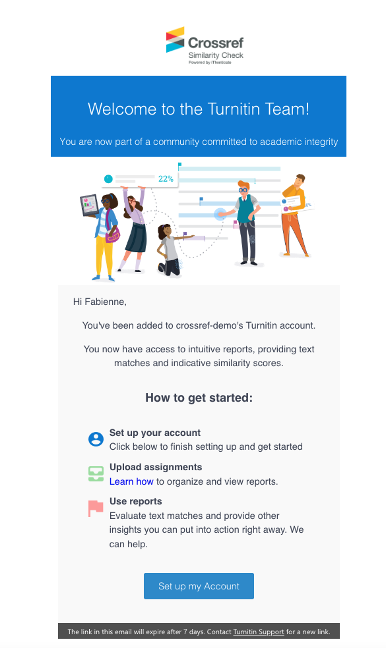
You will receive an email from Turnitin with a link to set your credentials. The email will look like this:
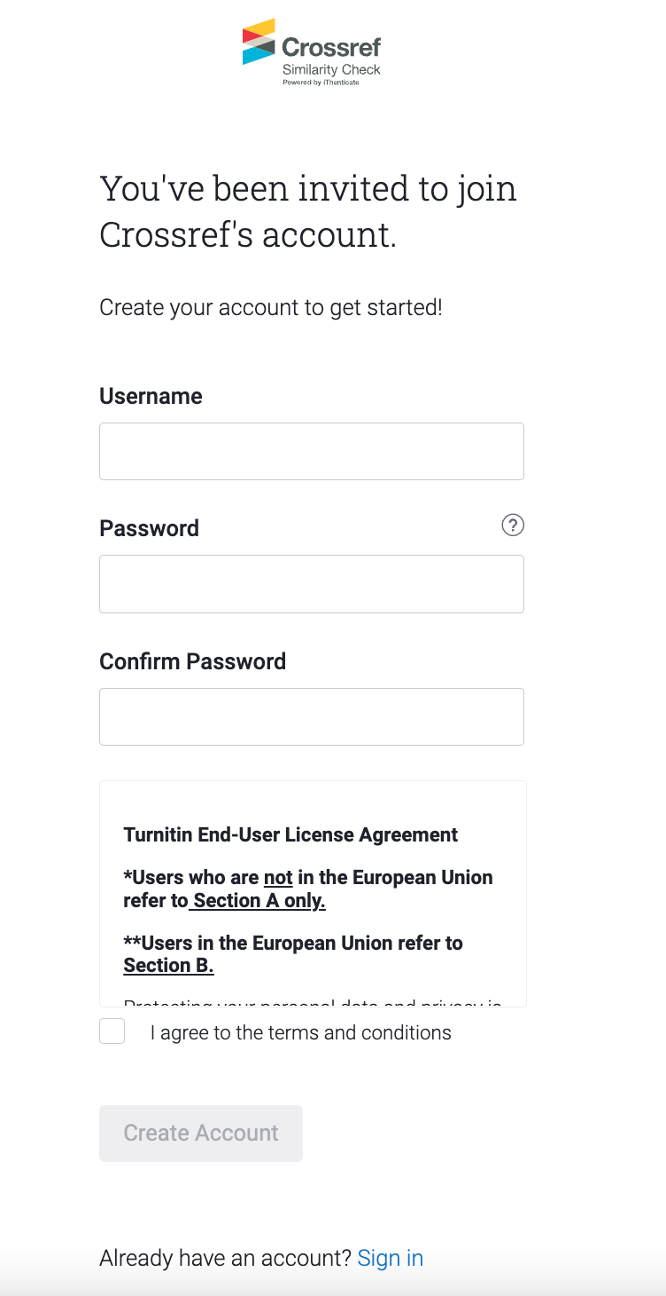
Click on the blue ‘Set up my account’ button at the bottom of the email. This will bring you to a page which looks something like this:
Fill out your username and password, and don’t forget to tick to agree to the terms and conditions. You will then arrive at your new iThenticate v2 account.
How do you know if you’re an account administrator?
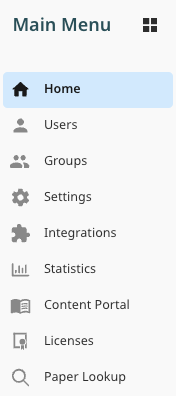
hen you are logged in to iThenticate, what tabs can you see?
If you’re using iThenticate v2, you will only be able to see Users on the menu if you’re an account administrator.
If you’re using iThenticate v2, you will only be able to see Users on the menu if you’re an account administrator.
So if you can’t see Manage Users or Users, you’re not an account administrator, and you can just read the user instructions for iThenticate v2 on the Turnitin website.
Updating your email address, username or password in the future
If you need to change your personal email address, username or password in the future, you can find instructions on the Turnitin website.
If you forgot your password and have never signed into your new v2 account, you’ll need to reach out to Crossref’s support to have your password resent to you from Turnitin.
If you’ve already signed into your v2 account, but can’t remember your password, you can simply use the Forgot Password link on the login screen of your unique v2 website (https://crossref-xxx.turnitin.com, with xxx being your member ID).
Page owner: Amanda Bartell | Last updated 2022-July-15